

I’m dead happy with the way my budget build gravel bike came out, it rips. It busts up tarmac and gravel like it ‘ain’t no thang, and is smooth whilst at it. This has given me a hunger to push the bike a little further……..
Now some might say thats madness. Its a 1994 Dawes Street Sharp. ITS NEARLY 30 YEARS OLD, when it comes to crunch its just an old mass produced steel frame with canti’s. To them I say, YOU KNOW NOTHING OF THE CRUNCH! Its a hand brazed, smooth riding, Reynolds 501 tubed master piece with brakes that are perfectly suitable for the terrain on my doorstep! (maybe thats a little rose tinted…). It’s great to ride, the position is good and the front end is nice and compact giving good scope for slamming if I wanted to.

There are a few things i’m not so keen on though, not that they don’t work (best thing about this bike is that it just works really well)……. its just that they could be optimised! Four things: the stem setup, the wheels, the seat post, and the brakes. Then on top of that I would like to make it look a little snazzier!
Ok, the stem setup. The bike is old, so the standards are old. It has a 1″ head tube, which means a threaded headset, and in turn a quill stem. As we all know traditional quill stems were designed to fit with the bar standards of the time, ie 25.4mm diameter, but bars have come on in shape and performance since the mid 90s (mainly because of material benefits). These new bars unfortunately only come in a 31.8mm bar clamp diameter, and this presents a problem when it comes to quill stems. Most are made for 25.4mm bars. To get around this and get the bike running with what I had I bought a 1″ to 1 1/8″ quill stem adapter. This allowed me to use a standard Ahead stem and 31.8mm bar from another bike I had. Whilst entirely functional it has its drawbacks, its ugly for starters, heavy, and has more potential for failure with more bolts and points of attachment. What I needed was either a set of new forks that were 1” ahead so I could use a reducing shim to fit my current stem without the quill adapter, or a 1” quill stem with a 31.8mm bar clamp. It seems either aren’t exactly common….
Trying to find a quality fork is an issue, there seems to be a few high tensile steel forks out there but i’m just not prepared to drop the quality from current chromoly. Paying out for a custom one to be made is out of the question too. Although I did stumble across some absolute beauties from manuafacturer Wound Up Composites.

Although at £300+ I think they are out of the question….. Money no object i’d have a set for the charge as well! All things considered the current forks are staying.
Stem then, I need to ditch the current ahead setup. It just bugs me. Whilst entirely functional its overcomplicated, weighty, and generally unrefined. The search started for a 1″ quill stem that accepts a 31.8mm diameter bar, and I got some reasonably priced solutions. Oh and some expensive ones. Here we go……

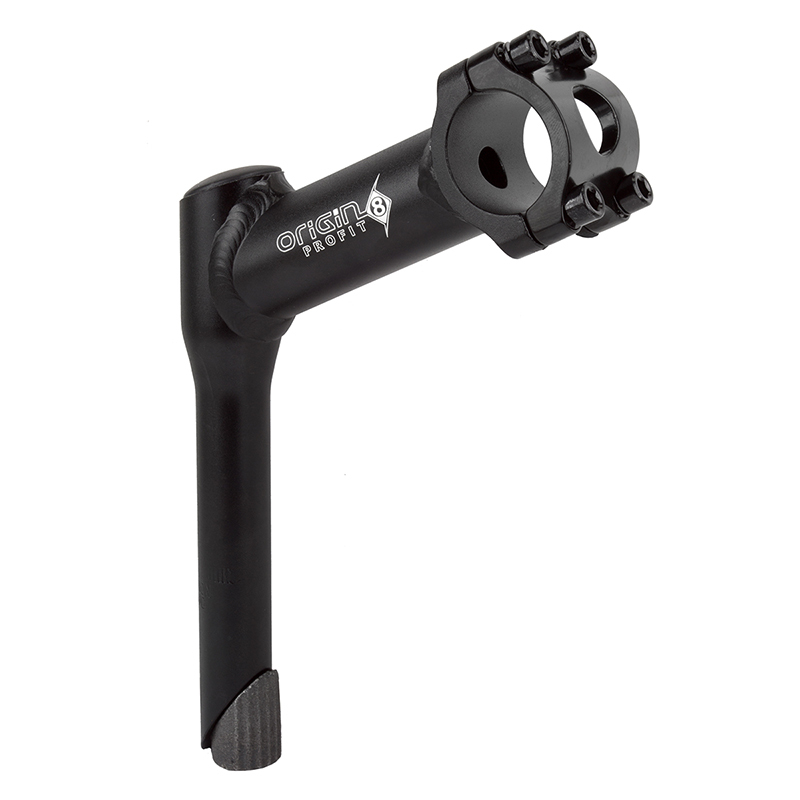

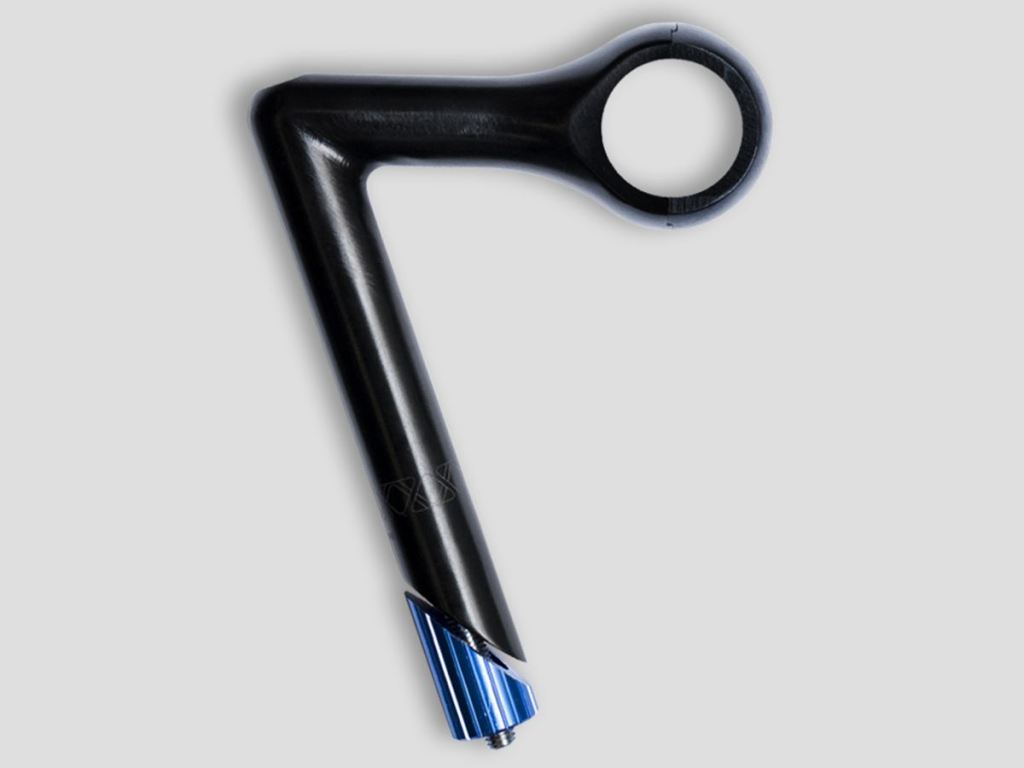

Guess which one i’m going for? theres some pretty stems in there, for me the best looking is the one thats also the cheapest (well the factory five version isn’t!). I’ll have a J&L one on order in the near future, it also gives me the bar position needed. Oh and it does come in black as well!
Onto the wheels…… currently I’m running the original 26 year old wheel set. Alesa 917 built onto Shimano parallax 36 hole hubs using 2mm stainless straight gauge spokes. Indestructible wheels for their time, thats almost BMX level spoke count! double walled, hard anodised, and double eyletted rims. Probably why they are still straight and look almost as good as new all those years on. But they aren’t light, rims probably around 620g each, spokes 7g each, hubs 221g and 380g. 2345g is not that light!
My plan is to build a new set at home (wheel building really isn’t that scary people!) with some carbon rims from my friends at Rinasclta. I have some 32h Shimano LX M570 hubs (about 600g for the pair) that I will build onto some 38mm deep, 27mm wide carbon rims (465g per rim) using Sapim Laser spokes (4g a go). Im hoping to build a sub 1800g wheel set. A saving of nearly 600g! and if I can find some lighter hubs I’ll be onto a winner.

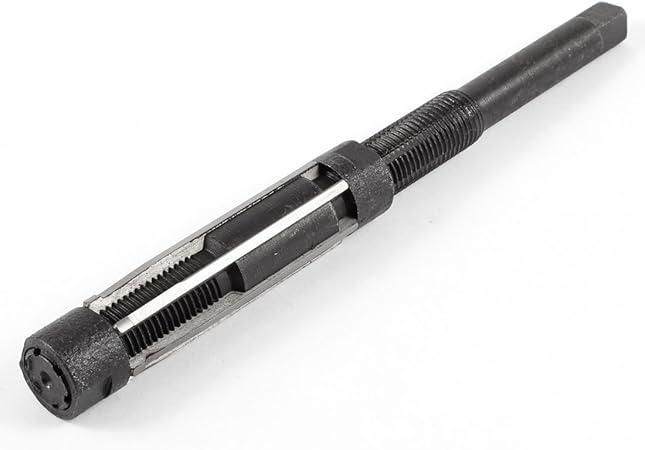
Seatpost. This should be an easy fix yeah? get rid of the weighty ugly looking silver thing for a nice svelte matt black chinese carbon fibre job from eBay. Should save me another 100g for less than £20. Oh if only it was that easy……….. you see the frame is 90s Reynolds 501, and that means (because its a Dawes) a 27.0mm seat post. They simply don’t make carbon posts in 27mm dead. 27.2mm is too large or or a 25.4mm too small. Yes I could shim a 25.4mm but id rather not risk the (very high!) possibility of slipping.
After some research on seat post sizes for Reynolds framed bikes (both 501 and 531) it seemed that 27.2mm was indeed a popular and fitted size, so why did my frame have a 27mm? Because of reaming, or lack of so it seems. Reynolds seat tubing can have an internal diameter from 25.4mm all the way up to 27.2mm, when the seat tube has an external diameter of 28.6mm. This is all depending on the level of butting in the tube or reaming carried out by the frame builder. Ie what spec tubing or what tools they have (or indeed what stock of seat posts they have sat around in that size!). Simple fix then would be for me to ream the tube by 0.1 of a millimetre to allow me to fit the 27.2mm seat post (0.1mm off internal wall is 0.2mm over diameter). Ebay again then for a reamer! This will take the seat tube out to a tolerance that would have been a possibility for the tube set, so theres no fear of weakening.
New stem, new wheels, and lighter seat post will all make it faster……. but what about stopping? reality check though i’m not going to be going that fast on a gravel bike but even so, in their current state, the brakes leave a lot to be desired. Brakes are Shimano 5800 105 levers and tektro cyclocross cantilevers. I know what you are thinking…… “how do you not fly over the bars every time you yank the anchors?”. Alas no, the power just isn’t there! Maybe its just the setup, I need to play with the leverage for the saddle cable, but at the moment they have the grip of a 90 year old thats been handling butter. Or, you know, I could just upgrade them……. Discs are not an option as the frame is canti only (not for the hate of tech! its ’94 yeah!) so upgrading is relatively limited, but there is an option. V brakes, not just normal MTB v brakes though, mini v brakes. Mini v brakes have reduced arm length to work with the reduced pull of the road levers, the drop bar levers simply don’t pull enough cable through for normal v brakes.


The benefits of the mini v brake are increased power and simplified cable routing. The downside is reduced mud clearance. I can’t say that I’ve suffered with mega mud entrenchment round here though being as I mostly ride gravel…. but when it gets faster or more technical that bit of extra power to hand without having to grip the lever like i’m delivering a 12lb baby would be nice. Especially if they do actually stop me! I’m going to go for the Litepro, they are super light and super cheap!
Ok now to making it look nicer. From experience I’m a fan of powder coat, and not such a fan of hand spraying. Ive had bikes powder coated before and they have come out fantastic, but the colour options are a little limited. That being said, the coating is super tough and really protects against the elements so easily outweighs the downsides. Then theres the hand spraying option. When it comes to funky hand spayed paint jobs theres a new kid in town that all the hipsters are using, SprayBike. SprayBike is a new aerosol paint that has been specifically designed to work on bike frames. Its super high pigment so should coat a frame really quickly, and apparently its a dry powder coat so it should be tough. My personal view on this though is it seems a lot of work to get the results you want, and even then the finish on the paint is kind of rough. Im a fan of slick and shiny finishes, don’t know how spray bike would take a wet flatting and polish. Anyway check out Spray bikes website.

Then its a simple game of choosing a colour (real simple! not) and getting it done. Any colour suggestions? i’m actually a little impulsive when it comes to colour schemes and usually end up choosing colours by rocking up at the powder coaters and asking to see what they’ve got…… but i’m so tempted with pink! I’ve never had a pink bike before…….
So there you go, thats my gravel bike plans for this year laid out. Seeing as the cycling budget is a little stretched at the moment (I can’t build a £50k pain cave and buy a new bike as well….. when I say pain cave I obviously mean the utility room thats strapped onto out house extension) i’m up cycling! And come on, vintage steel trumps modern alloy every day of the week!
Looking forward to this project and getting it built, and seeing how it rides!
BC

I’ve been following you for a while & your post about building your own gravel bike, on a budget, inspired me to try the same. I’ve started with a Boardman CX frame, with Juicy Disc brakes. It had flat bars, no rear cassette, or any derailleurs. it now has drops, & a Shimano 105 set up
I’ll send you a link, to an Instagram post, once it’s done.
Thanks!
Stuart
LikeLike
Thanks Stuart! Great to hear and would love to see it 👍🏻
LikeLike
Looks like you have a great plan in place. I am looking forward to tracking your progress right along with you! Keep us updated!
LikeLike
Thanks! I’ve already had the reamer turn up……. plus I may have picked up some wheels already!
LikeLiked by 1 person
Funny the things we get excited about. I was downright giddy about my 1″ headtube starnut setter tool I received a week ago!
LikeLiked by 1 person